
View Leave Balance & Apply for Leave
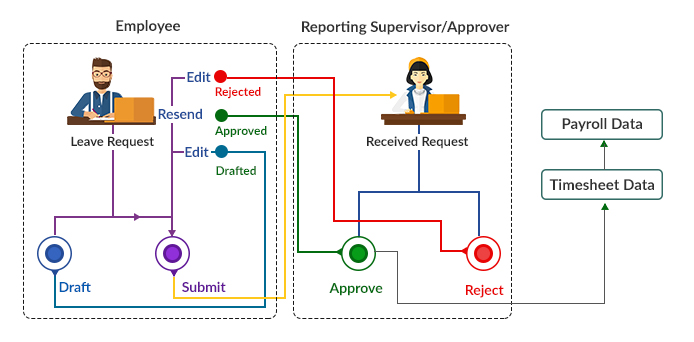
The application allows the employees to view leave/accrual balances, enter their absence, and get approval / disapproval notifications of their leaves. Employees can track the status of leave/absences submitted, and view absence history. The leave management process is illustrated below with description.
Functionality Overview
- Employees can enter a leave information in the portal. The application facilitates to draft the request for further modifications before submitting the request for approval. Employees can view their leave balances (while applying for a leave) according to the leave policies applicable to them.
- Upon submitting, reporting manager/approver receives the request and takes an action whether to proceed with approve or reject the request.
- If the request is approved, the employee receives the approved status. If the request is rejected, the employee receives the respective status, can edit request and resend it for approval.
- The time-off data will be auto-populated in employee timesheets for the respective dates. And it will be considered for the payroll process.
View Leave Balace
- On the Workforce menu, click My Forms and then click Leave on the sub-menu. The Leave page displays.
- View the types of leaves that you are eligible to use. In the Total Leaves Per Year column, you can check the total number of leaves accrued per year. In the Current Frequency Total Leaves column, you can check the total number of leaves accrued per frequency, i.e., you can check leaves accrued for the quarter, month, or year. In the Current Frequency Available Leaves column, you can check the balance leaves available for use.
Request for Leave/Time off
- On the Workforce menu, click My Forms and then click Leave on the sub-menu. The Leave page displays.
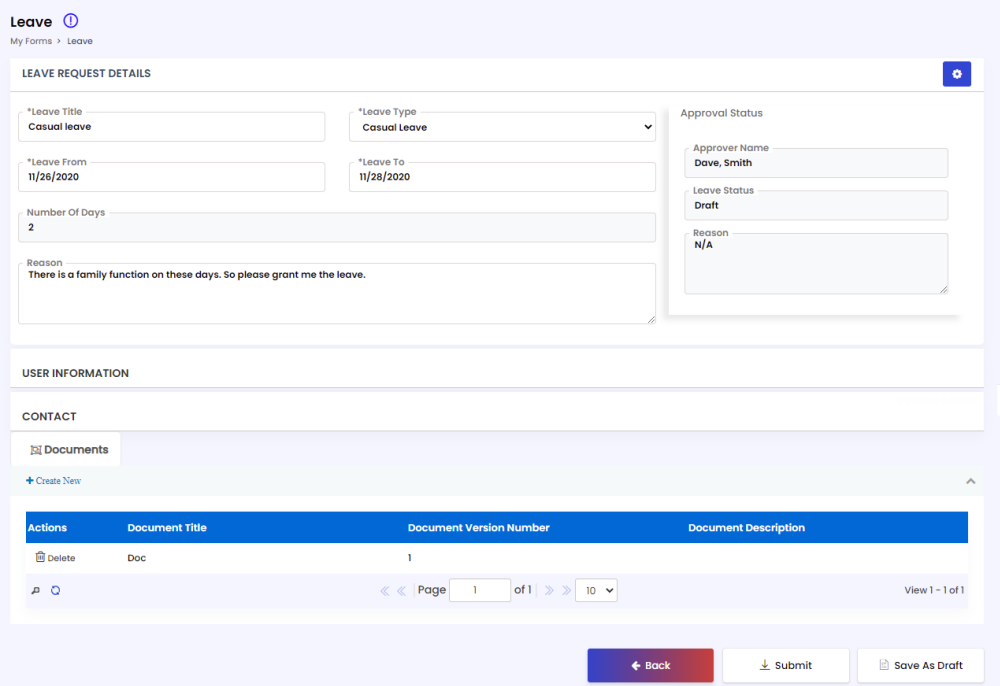
- Click the New button. The Leave Request Details, User Information, Contact and Documents sections appear.
- In the Leave Request Details section, provide the following information and click Save.
| Field | Description |
|---|---|
| Leave Title | Enter a name for the leave. |
| Leave Type | Select the leave request type from the drop-down list. |
| Leave From | Select or enter the date you want to start your leave. |
| Leave To | Select or enter the date you want your leave to end. |
| No of Days | You no need to enter this field. The application automatically calculates the no of days based on leave start and end dates. |
| Reason | Specify the reason for the absence. |
4. In the User Information section, you no need to enter any data. You can check your details like name, staff id, supervisor name and cost center name.
5. In the Contact section, provide the following information and click Save.
- Address 1 & Address 2: Enter your locality address in the respective fields.
- City: Enter the city name where you reside.
- Zip/Pin code: Enter the Zip code of the local address.
- Mobile: Select the country and enter your mobile number.
- Home Phone: Select the country and enter your home phone number.
- Primary Email: You no need to enter this field. The application automatically takes your email address from your profile.
6. To add documents associated with the leave, click the Documents tab and then click Create New button. Provide the following fields on the Documents popup window and then click Save.
- Document Title: Enter the document title.
- Document Version Number: Enter the version number of the document.
- Document Description: Enter the description of the document.
- Upload Document: Browse and select the document by clicking the Choose File button.
- Notes: Type any other comments, further explanation or information about the document.
After saving all the details associated with the leave request, you can submit the leave request to your supervisor to get approval. Click the Submit button to request the leave.
Track Workflow Status of Leave Request
Employees can view the status of their leaves applications submitted and keep track workflow stages information, including comments provided by stage approver(s). Until the application is approved or rejected, the status will be shown as Pending. And it will be concluded as Approved only if it goes through the entire workflow without being rejected at any stage. If the application is approved, you will see the approval status as Completed and you will get a notification. If it is rejected, you can see the status as Rejected and you can find the reason for rejection.
To track the workflow status:
- On the Workforce menu, click My Forms and then click Leave & Time off on the sub-menu. The Leave page displays.
- Click the circle button on the top-right corner of the Leave record for which you would like to track the workflow status.
- Click the User Approval Log button on the Workflow Status- Leave page to view more details of the workflow.